Step 2 - Creating Scene Navigation
This step will show you what you have to do to specify your virtual space scene navigation in the website that you can generate for your virtual space.
- Find the "Navigation View" on the right side of your Virtual Space window. In the right upper corner is a button with this icon:
 .
.

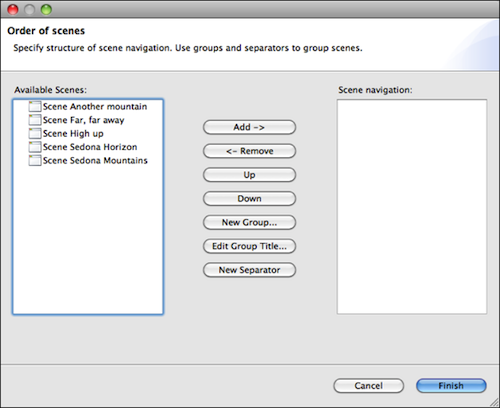
- Click on this button. The following dialog will open.

The left list shows all available scenes. The right list shows the scenes you chose to be in your navigation. You can move a scene from one list to the other by selecting it and clicking Add or Remove. Add moves a scene from the left list to the right and Remove removes a scene from the right list and adds it to the left.
-
You can group scenes with groups and separators. A separator will simply put some space between two scenes in the navigation. A group has a title "contains" the scenes it groups together. To add a separator, click on the button labeled
New Separator. To add a group, click on the New Group button.
-
You can remove separators and groups by clicking on the
Remove button.
-
You can change the order of your scenes, groups and separators by using the
Up and Down buttons. Select the object to be moved and click one of the two buttons button.
-
To put a scene in a group, first select the group you want the scene to be in then select the scene in the left list and click
Add.
-
When you're done with your navigation click
Finish. Note: scenes that are in the left list when you hit Finish will not appear in the navigation of your website.
When you generate the website for you virtual space, it will now have the navigation you specified above. You can change the navigation anytime by starting with 1.
 .
.


