Step 4 - Linking Module Categories
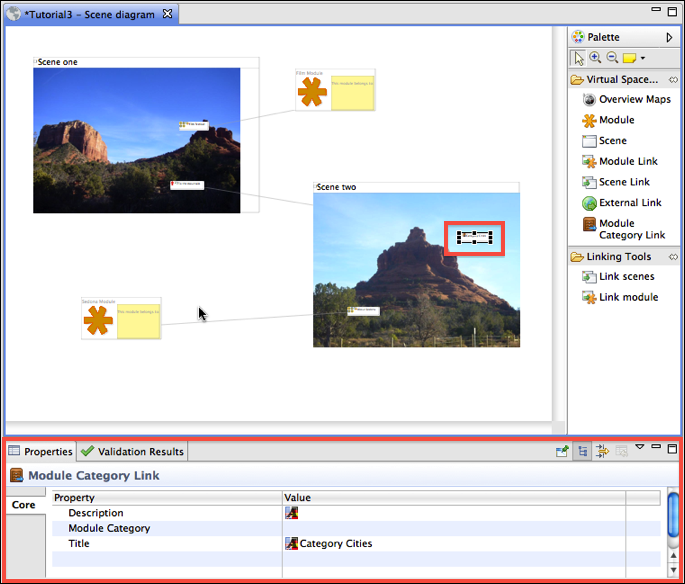
Module Categories can be linked from scenes with "Module Category Links." In this step, you will link the module category "Cities" from "scene two."
- The scene diagram editor should be open. From the "Palette" click once on
Module Category Link.

- Click somewhere on "Scene two" and type "Category Cities".
- Hit enter.
- If the new link is not selected, select it. The properties view should show the properties for the new Module Category Link.

- Click in the row "Module Category". Click on the little button that appears at the end of the row. From the pull-down menu that opens select the module category "Cities".

- Click somewhere in the scene diagram editor to activate it (its tab becomes blue) and save your project.
- From the main menu select
Project >> Generate >> Generate HTML.... Use the choose button to select a folder in your file system where the HTML pages should be stored. Click Finish.
- In the generated website (it should look like this) navigate to scene two (link "to the mountain"). There is a link "Category Cities" when you click on this link you get to the webpage generated for the cities category. If you go the Sedona Module you will find that below the title of the module there is now a link the "Cities" category.
You've successfully finished tutorial 3.


