Step 1 - Import Module Categories
Before you start with this tutorial you need to create a new virtual spaces project (see tutorial 1). Also, you will need a SKOS file to import, you can download an example file here.-
From the main menu, select
Project >> Import Module Categories from SKOS file.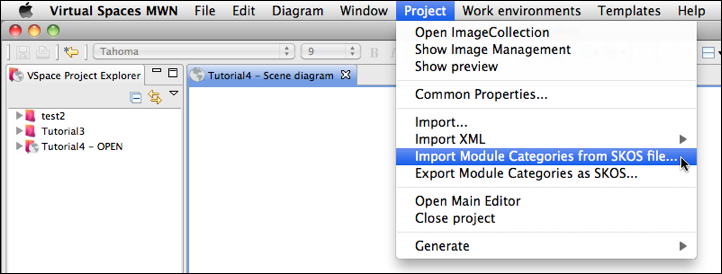
-
A wizard opens. Select the SKOS file to be imported (e.g. the one you downloaded in the beginning) and click
Next. -
Virtual Spaces will show you the SKOS concepts you are about to import. Click
Next.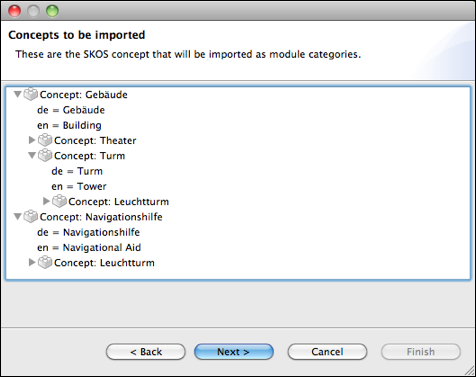
-
The next page of the wizard will show you if Virtual Spaces found languages in your Virtual Spaces project that correspond to the ones used in the SKOS file (the 2 letter language codes are used). Since you probably didn't add languages to your project yet, you should see the following page:
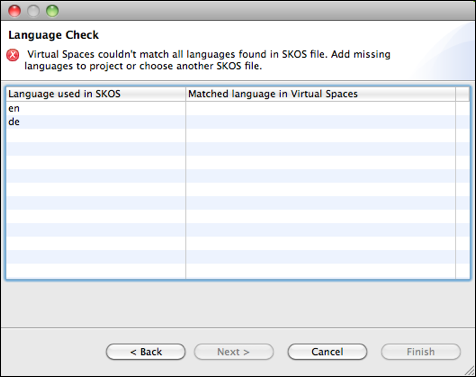
-
Click
Canceland add two languages to your project: Deutsch (de) and English (en). See tutorial one, step 1, point 6 for help. -
After you added the necessary language, select
Project >> Import Module Categories from SKOS fileonce again and choose the SKOS file again. This time the language check should page should look like that: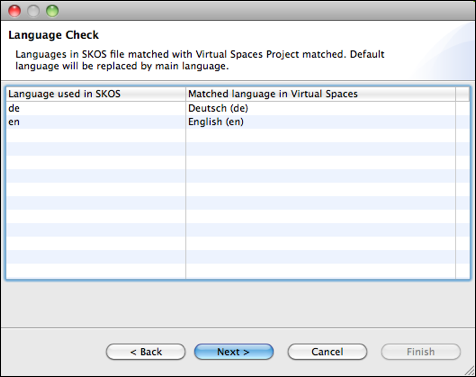
-
Click
Next. Virtual Spaces should now tell you that there is conflict. SKOS allows a concept to be related to several other concepts through aSKOS:broaderrelationship, Virtual Spaces module categories in contrast can only have maximal one parent category. Therefore if a SKOS concept has several broader-relationships, you need to select one of the broader concepts to be a parent category.For the example file, you downloaded earlier this means you have to select a parent concept for the concept Lighthouse/Leuchtturm form the drop-down menu.
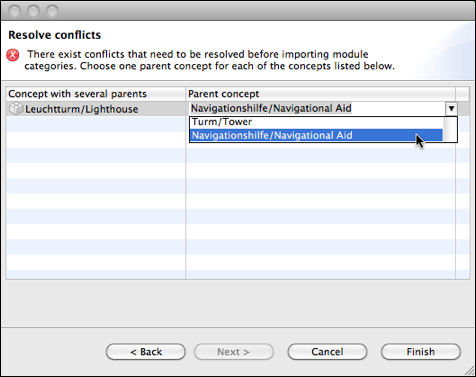
-
The
Finishbutton should now be enabled. Click it. The concepts in the SKOS file will be imported as module categories. The module category editor should open and show you the newly imported categories.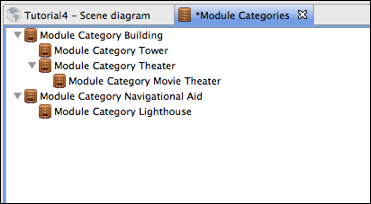
- Save your project.

