Creating Slides
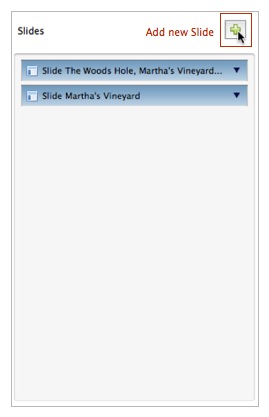
To create a Slide the Module Editor for the Module the new Slide shall belong to must be opened. In the column where the Slides are listed click on the add button (see image below). A new Slide is added to the list of Slides. See here for further information on Slides.

Click on the header of the new created Slide (see image below) to edit the properties.

Title, subtitle, description and footer
To edit title, subtitle, description or footer of a Slide use the corresponding property field. See here how to use property fields.
Template
To set the template that should be used for the Slide's layout select a template from the drop-down menu. See here for further information on templates.
Images
To add a new image to a Slide the Slide must be expanded. If it's not expanded (content of Slide is not visible) use the little triangle icon next to the title. An expanded Slide is shown below.

Use the Add new image button (green bordered) to add a new image. There are two types of images that can be created: Local Image and Web Image. Local Images are images located on the computer where Virtual Spaces runs on. Web Images are images somewhere on the Internet. A Web Image stores the URL of an image on the web. The image is not copied to the local machine. Use Web Images if you are working with an ImageCollection. Use Local Images if you are working with the Local Image Management or if you add images directly from the file system. See here for detailed information on images.
When the new image is added it appears in the list of images. If you've added a Local Image you have two possibilities how to proceed.
- You can select an image directly from the file system by using the
Editbutton in the property field. The image you have selected is then copied to your project folder into the foldersceneImages. - You can use the Local Image Management. Drag the title of the image in the Local Image Management View and drop it over the image in the list. The cursor should show an add sign (see image below).

Notice: The title of the image in the Local Image Management is also added to the Local Image.
Attention: The Local Image points to the image in the file system. That means that any changes made to the image in the Local Image Management (including deleting the image) are not reflected in the Local Image.
- You can set the image by entering the URL of the image in the web directly in the property field
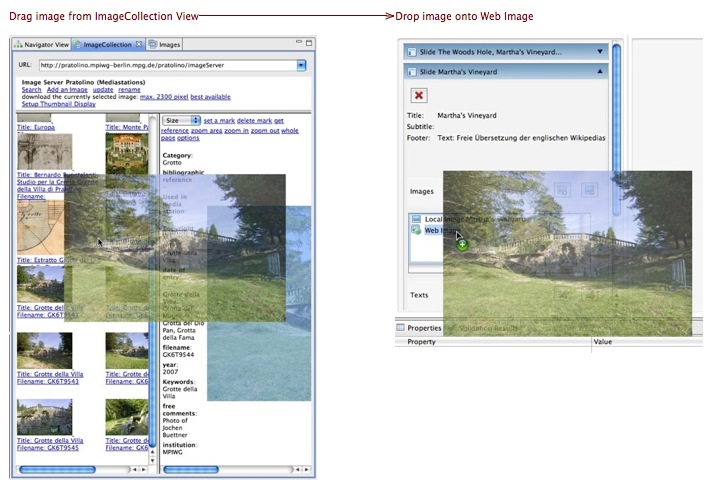
Urlby using theEditbutton. - You can drag an image from the ImageCollection View and drop it over the image in the list. The cursor should show an add sign (see image below).

Notice: If you use an ImageCollection drag the scaled or modified (e.g. by using the "zoom area"-tool) image and not the thumbnail in the overview list on the left side.
To delete an image select the image in the list of images and press the Delete image button.
Use the up and down arrows  on the right side of the image list to define the image order. The image numbers are used in the templates for Slide and Branching Points.
Texts
To add a new text to a Slide the slide must be expanded. See here for further information on texts.

Use the Add new text button to add a new text. A new text element appears at the end of the list of texts. Select the text and use the property Text to enter text.
To delete a text select the text and press the Delete text button.
Use the up and down arrows  on the right side of the text list to define the text order. The text numbers are used in the templates for Slide and Branching Points.

