Step 10 - Linking your Module
The last thing you have to do before generating HTML pages for your virtual space is to link your module.
- Choose Module Link from the palette and click on it. Then click somewhere on the background image in "Scene two". A module link will be created at the position you've clicked.
- An editor field opens to enter a title for the link. Enter "About Sedona" and hit enter. You have now a rectangle on the background image that contains the title of the link.
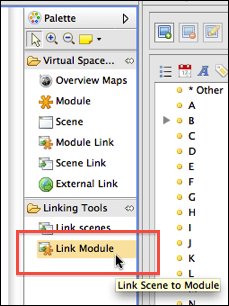
- Similar to linking two scenes there are three ways of linking a module link to a module (see step 2 for details). Here, the method that uses the palette is used. Choose
Link Modules from the palette and click on it.

- Click on the module link you've just created, keep the mouse button pressed and move the mouse over the module. Release the mouse.

If you did it right a line should appear between the module link and the module. If you chose to link the module using the properties view, the line between module link and module will appear next time you open your virtual space.
- Save your project.
Continue with
step 11.


