Step 7 - Organizing Slides in Sequences
Each slide that you want to be included in your virtual tour through your virtual space has to be contained in a sequence and this sequence needs to be reachable. You'll learn how to make your sequences reachable in the next step. In this step, you will create two sequences that contain the slides you've created in the previous step.
- In the right most column, click on the button with the plus sign to create a new sequence.

A new sequence will be added to the sequence column. It is represented by a green box (in the following also called the sequence header).
- Click on the sequence header to show the sequence's properties in the properties view. Change the title of the sequence to "Climate." As you did it with the properties of slides, you change the title by clicking in the
Value column in the row labeled "Title" and click the Edit button.
- Open the sequence by clicking on the little triangle at the end of the sequence header.
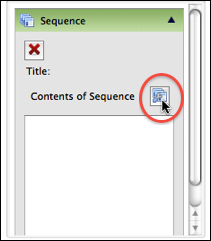
- Click on the edit contents of sequence button:

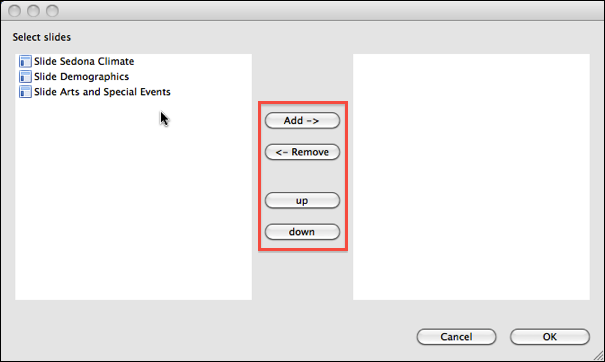
The following dialog appears:

- The left list contains all available slides in the module. The right list (currently empty) contains the slides that this sequence contains. From the left list select the slide "Sedona Climate" (or the corresponding one in your project if you used different titles). Click on the button labeled
Add -> to add the slide to the right list (to the sequence). You can change the order of the slides in the sequence by using the buttons up and down. The first slide in the list is the first slide in the sequence.
- Click
OK.
- Close the sequence by clicking on the triangle in the sequence header again.
- Create a second sequence called "Futher information" that contains the other two slides "Demographics" and "Arts and Special Events."
- Save your project.
Continue with
step 8 to learn how to link your sequences.


